Ruya – Version 1.7

Ruya – Version 1.7

Hello to you wonderful people! If you were unaware we recently did a BIG UPDATE to Ruya for you all.

Here’s what’s new:

◆ Controller support!
◆ UI overhaul with new animation system.
◆ Frame rate no longer drops when opening and closing options screen.
◆ Reduced overall sprite count.

Updated Platforms:

iOS AppStore
Mac AppStore
◆ Google Play
Itch.io
◆ Steam

We’re really proud of it as there’s now full controller, keyboard and mouse support. This opens up a wave of potential in terms of accessibility! Before the game was mouse only but now players are able to interact with Ruya in multiple ways opening the door to the types of people that can use the game with ease as they see fit. Accessibility is something we’ve been thinking about a lot lately thanks to our buddy Joe who’s a big advocate for it on our Twitter feeds. Hopefully we’ll be picking up some wisdom about input remapping in Unity overtime and maybe you’ll start to see some that being embedded into our games in the future.

Free to swing any suggestions our way for future updates you might want to see in Ruya to our Twitter DMs or ping us an e-mail. In the meantime we’ll currently focusing on Alula and some other secret stuff, so keep and eye out for that.

Give a follow to our coder Tom on Twitter for all of his hard work and making this update possible. You can read about some technical details on UI optimisation and controller support in Unity3d that went into Ruya 1.7 on Tom’s blog post here!

– Miracle Tea 

Creating Binaural Ambiences for Alula

Creating Binaural Ambiences for Alula

Without a binaural microphone and for free!

Here at Miracle Tea we pride ourselves of a high level of dedication to creating meaningful experiences for our players and one of the elements that helps us convey this to them is immersion.

When I started working on Alula I was looking for ways to push the level of immersion we achieved in Ruya to a new level. I knew about binaural audio but only came across it in a VR context until I remembered this video I watched a few years ago.

This was most likely recorded with a binaural microphone, with the actors moving around it in real time and using the scissors and hair clipper close to the microphones. I remember I was mesmerised about how “real” it sounded so that’s when my quest to replicate that level of immersion started.

I looked at ambisonic microphones first of all but I had to change my plans when I found out how pricey they can get and on a second thought getting one wouldn’t have necessarily be all that useful as I would have been limited to recording real ambiences and sounds which wouldn’t have always matched the ethereal soundscapes I had in mind for Alula.

It’s when a friend introduced me to the SoudField plugin by Rode. I realised how a binaural recording could be easily decoded into stereo and keep it’s 360° feel intact.

With further research I came across the IEM plug-in suite which allowed me to actually simulate a binaural recording combining an indefinite amount of mono and stereo files of my choice and place them into the 360° space.

That was it! Exactly what I needed and for free!

Binaural and Ambisonic audio in a nutshell

Before diving into how I created my first binaural ambience for Alula let’s briefly define binaural audio and how it differs from ambisonic audio.

Ambisonic is a recording in playback format that presents itself as a full 360 degrees sound source, but while ambisonic audio has the capability to track the head movement of the listener (as when you’re playing a game on a VR headset) binaural audio is “head-locked”, therefore a sound coming from your left, for example, will keep coming from your left even if you turn your body 180°.

Ambisonics is the combination of binaural audio with the real-time decoding of your head rotation.

Step-by-step Process

To create my very own binaural ambience I used my DAW of choice Reaper and the IEM plug-in suite or binaural audio.

  • Add the Stereo Encoder plugin to a track.
  • Change the track channels input number to 36 for 5th order ambisonic.
  • Add a mono or stereo audio file to the track.
  • Create a parent track (36 channels) and add the FDNReverb and Energy Visualiser plugins.
  • Keep the reverb deactivated for now.
  • Add the Binaural Decoder plugin to the master track (36 channels).
  • Adjust the width, azimuth and elevation on the stereo encoder plugin of the child track
  • Repeat for as many child tracks you want to add 
  • Render the master mix as a stereo track keeping the binaural decoder active on the master track.

If you rather follow a video tutorial on how to use the IEM plugins check it out below…

And there you have it!

My first go at binaural audio resulted in this kind of creepy recording of my voice and footsteps walking around you and going on a ladder to speak above your head.

I then tried this on an ambience for the intro cinematic of Alula.

I’m looking forward to implement this technique on more elements of the game’s soundscape so if you have any suggestions for sounds you’d like to hear or you know of some ways to improve the 360° effect please hit me up on Twitter. or follow me on Soundcloud to keep updated on my work. I’ll be more than happy to take on your suggestions or criticism 🙂

Much Love,

Enrico

Controller Support & UI Optimisation in Unity3d

Controller Support & UI Optimisation in Unity3d

Greetings!

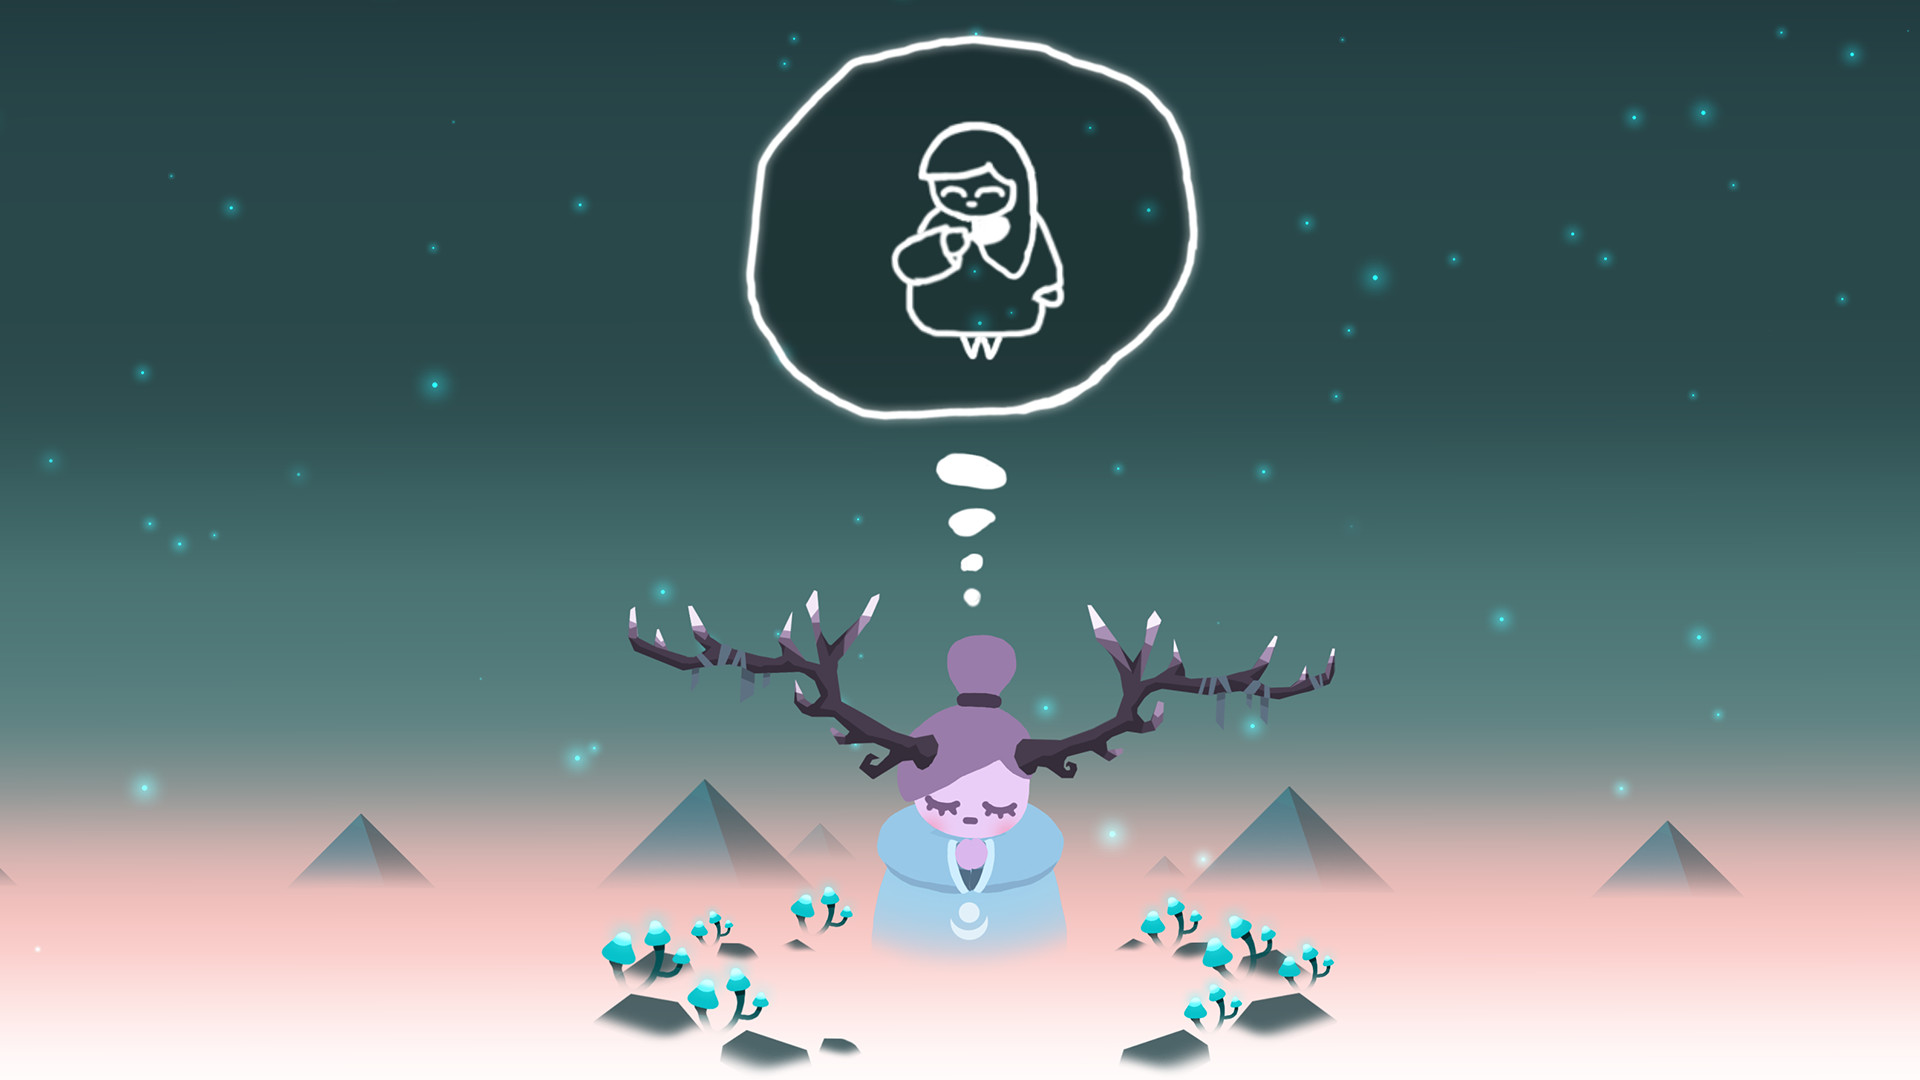
As a studio, we want to create games that touch people in deeply meaningful ways and to put something out into the world which has a positive impact in contrast to the much negative out there. A part of this endeavour has been to reach out to a broad audience that isn’t restricted to mobile players only, but to all puzzle game lovers, and gamers who are looking for something more than a casual game, something that expresses deeper emotions and self-reflection.

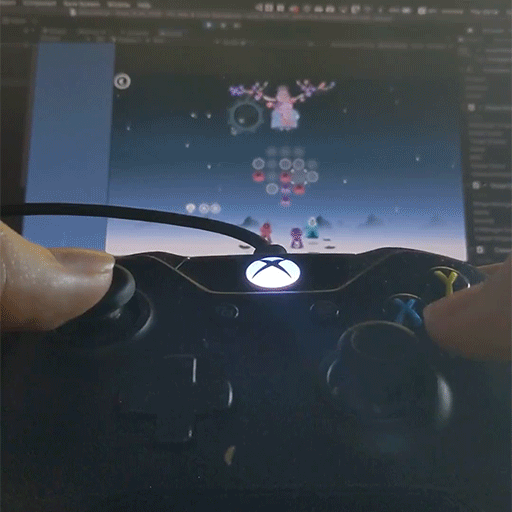
Porting to a range of platforms has been a learning curve for us as a studio as we look to broaden our skills and knowledge. We are pleased to share with you that we are developing support for game controllers and are pursuing a launch on the Nintendo switch and other game consoles in the near future.

In this developer blog we would like to share with you some of the tasks involved in developing compatibility for a game controller and improving performance by replacing some of our Unity UI animations with tweens.

Controller Support

We’ve been utilising Unity’s new input system which uses a new workflow that is designed to use Actions that separate the gameplay logic from user input logic.

Here we have used the Input System’s Action window to specify the core input such as cell cursor movement and throwing. We can add multiple bindings to add all types of controllers, touch inputs and joysticks. This enables us to cater for a wide array of consoles.

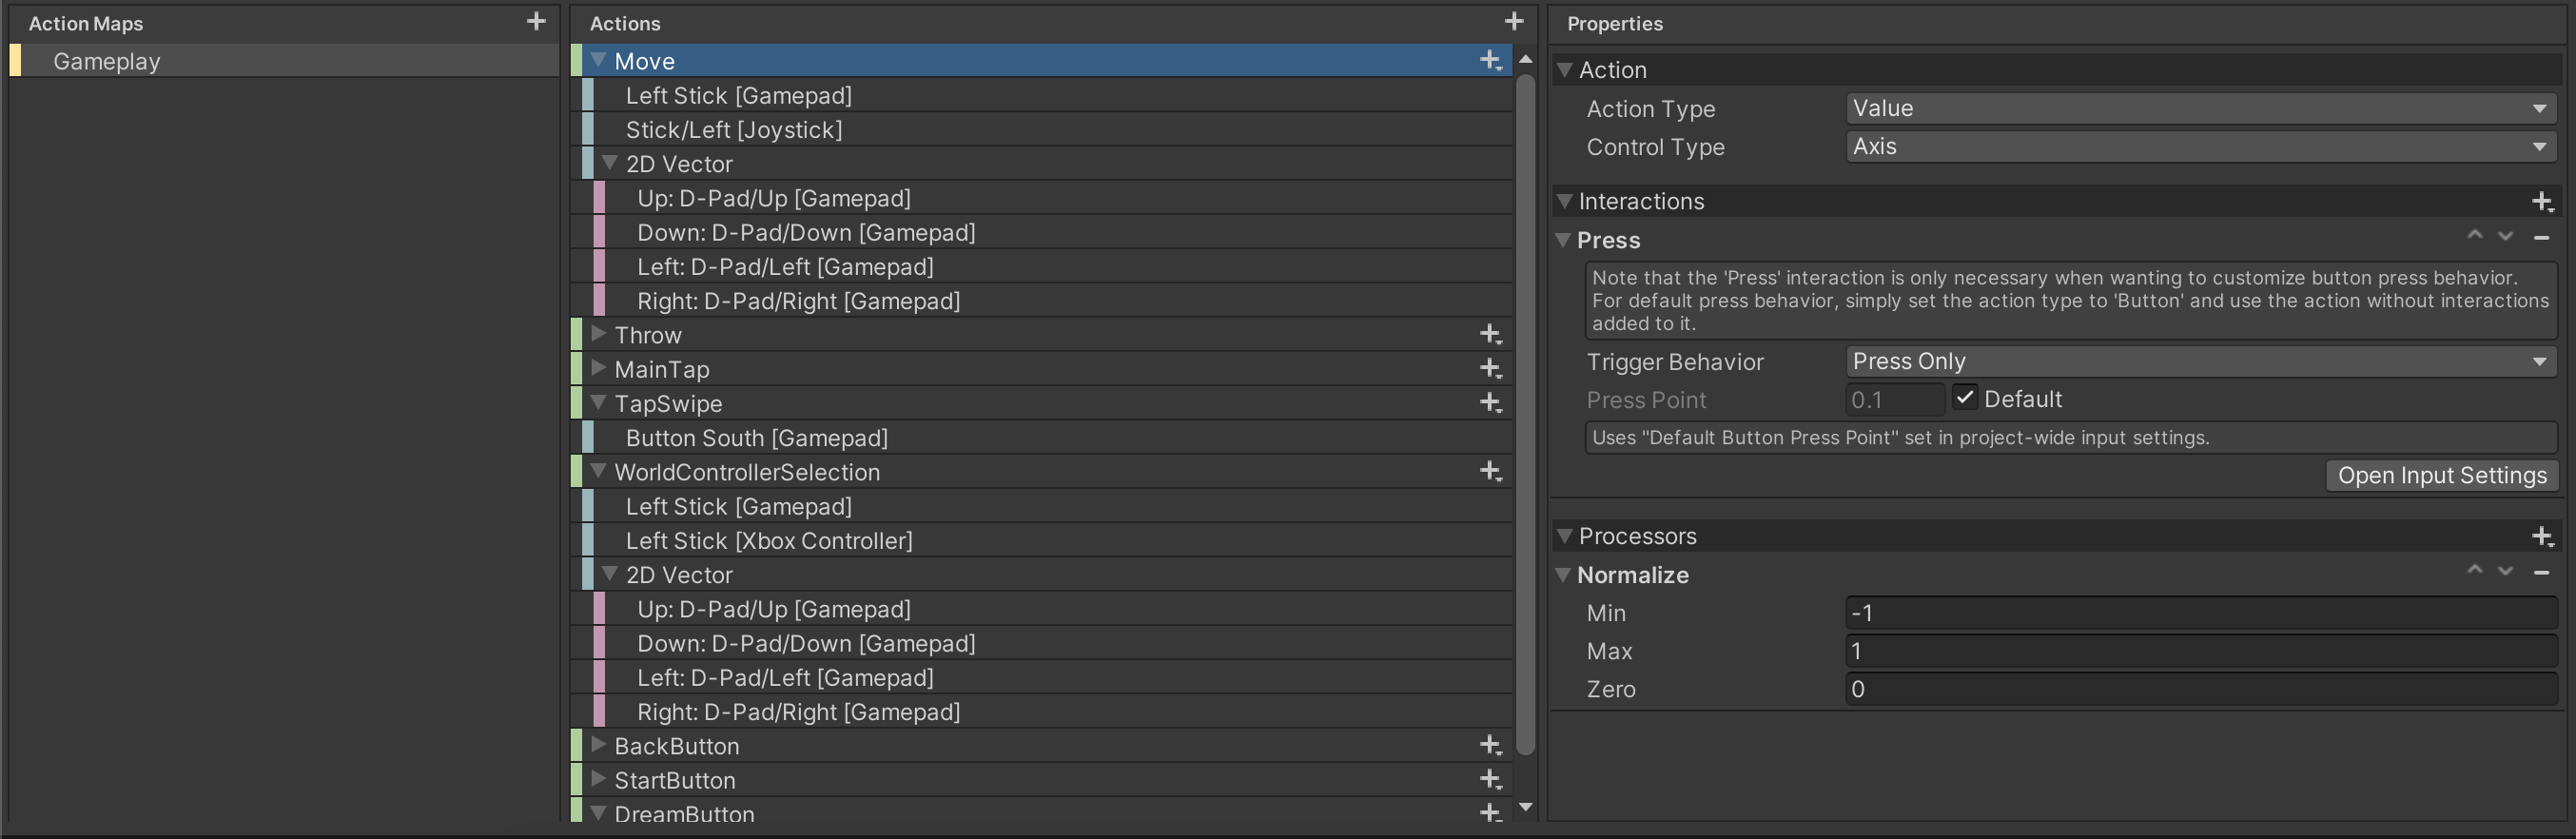
Once we’ve added the Actions we need, Unity creates a class upon saving this asset. We can then reference this in our code.

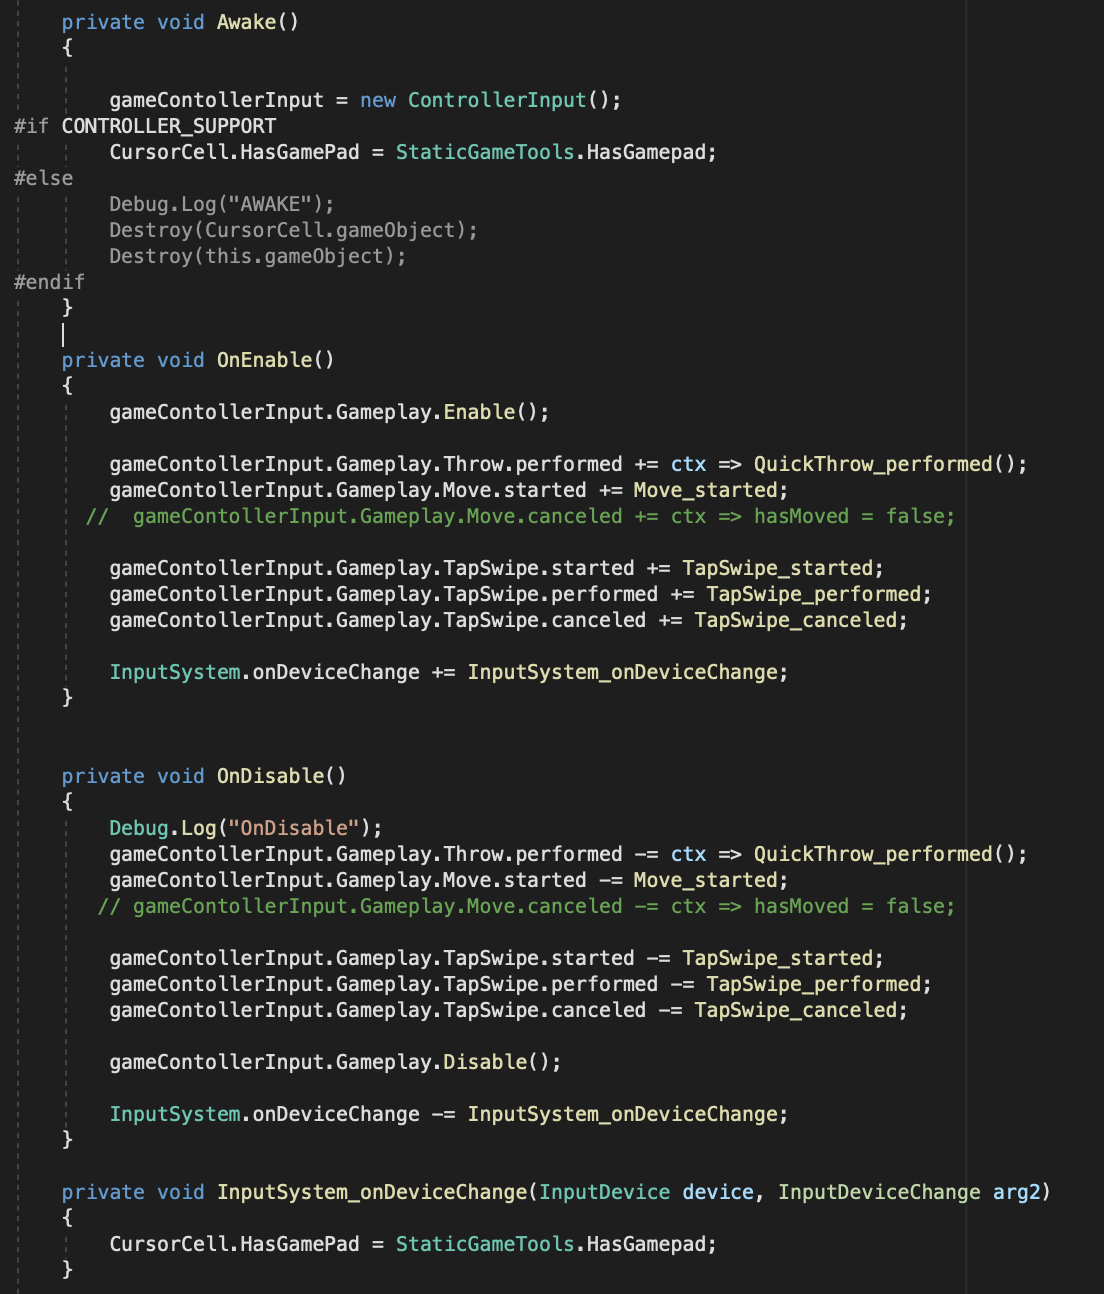
Enabling the class to listen for inputs and subscribing to these events allows us to work this into our already coded game logic.

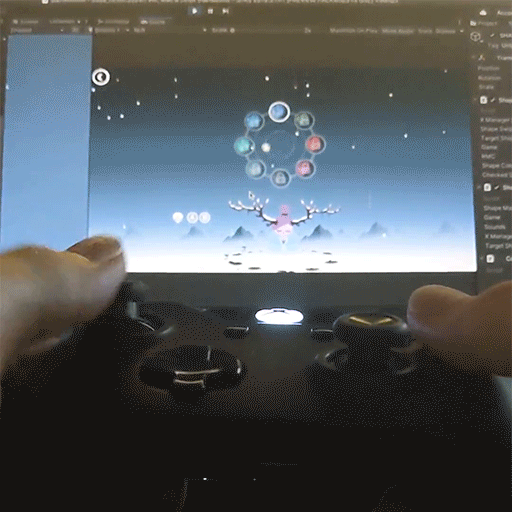
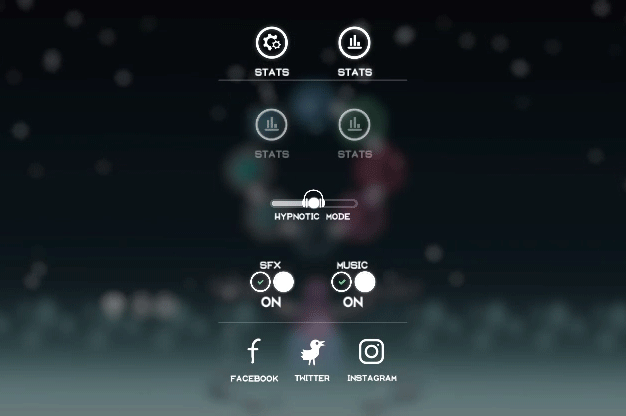
The easy bit was integrating controller support for the gameplay. But menu UX is important and our current menu system is only suitable for mobile. This meant a whole new redesign. Here are some of the mock-ups.

On start up, the game instantiates the correct menu based on the platform.

UI optimisation

As well as a redesign, we wanted to improve performance. There was a noticeable lag when opening the menu and this is believed to be because of using the Unity Animator for panels and buttons. A good video to watch goes into more detail about this.

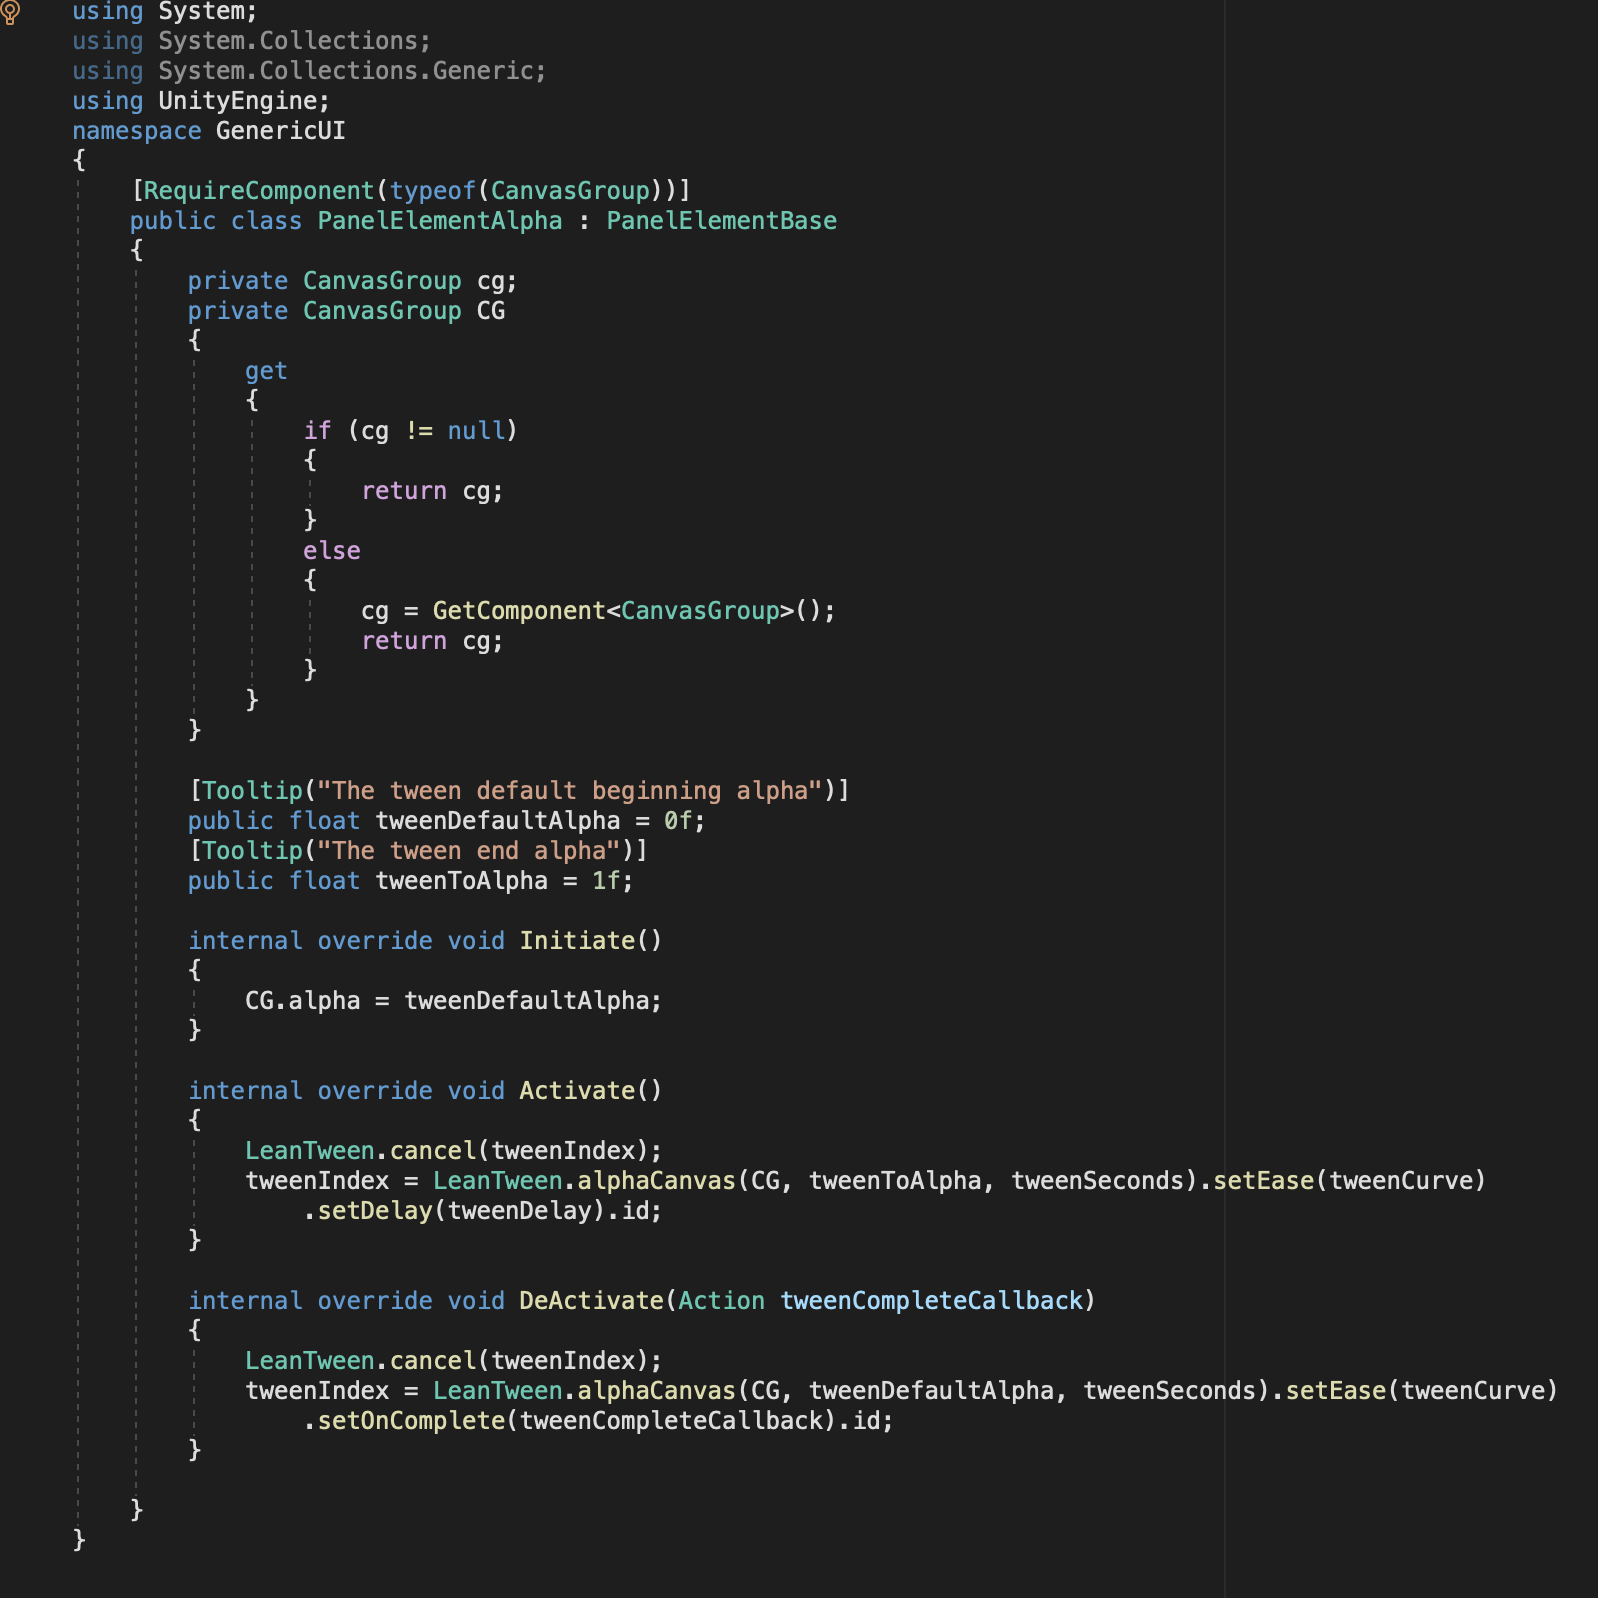
So we decided to do away with the Animator on all menu items and instead, use tweens! It goes without saying that we couldn’t have done it without Leantween which is an excellent animation tweening system available on the asset store. 

The animations that we generally use for menu objects are colours, scale and positions. So with this in mind, we began with coding a basic panel that fades in and out. We also added some activations which means we can hook up further panels to fade/scale/move in at different times . We exposed some of the LeanTween features so that we can get the right timings and replicate the game feel on the fly.

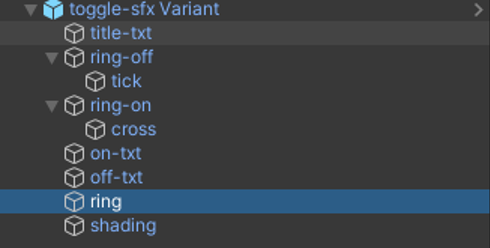
We also created a tweening system for toggles and buttons to replicate what was in the animations we were replacing. This mainly involved scaling rings and fading out images when tapped/clicked on. The input events were called via the unity event interfaces in code.

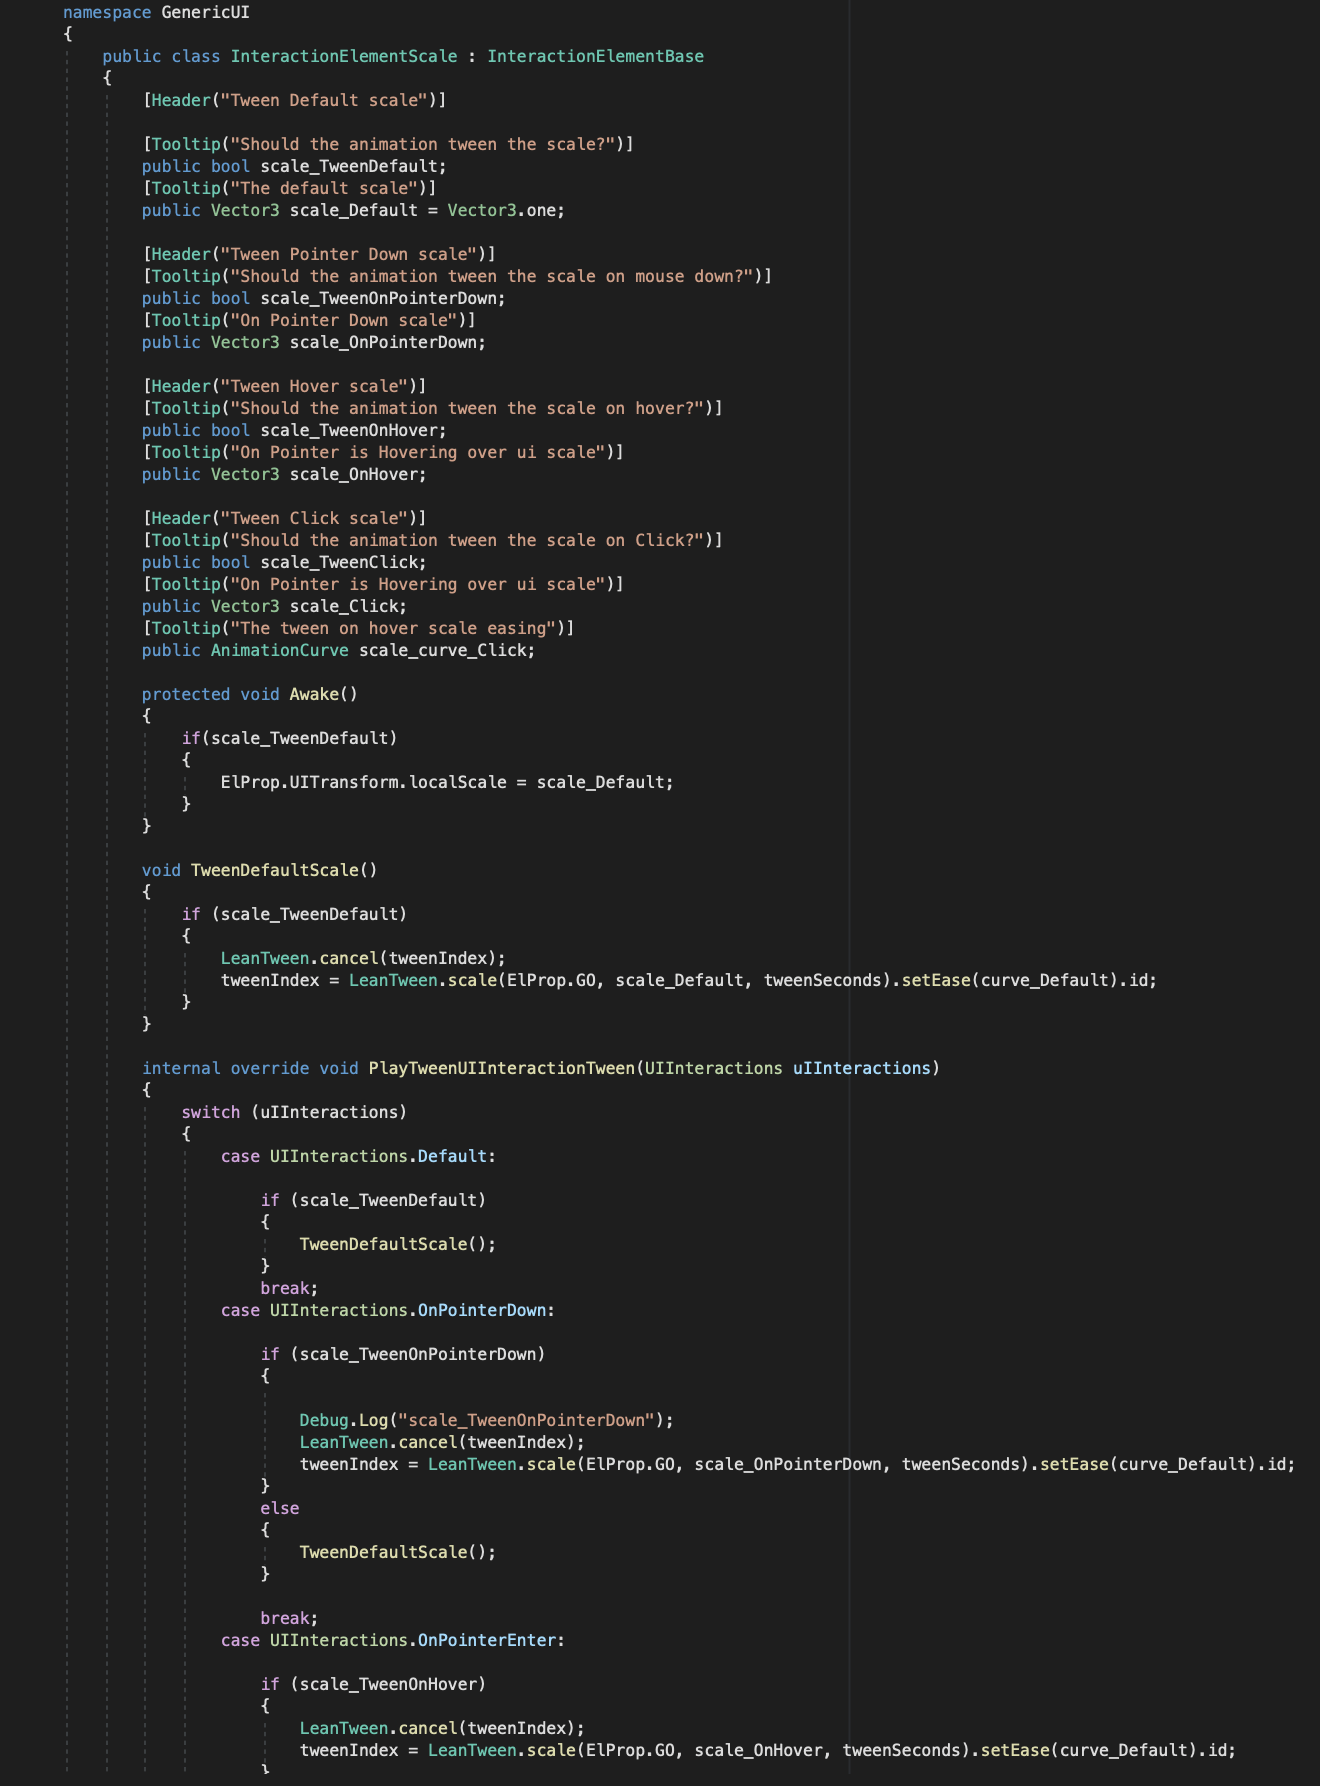
The interactive menu gameobject has a script which handles the input events and calls the elements within its child objects.

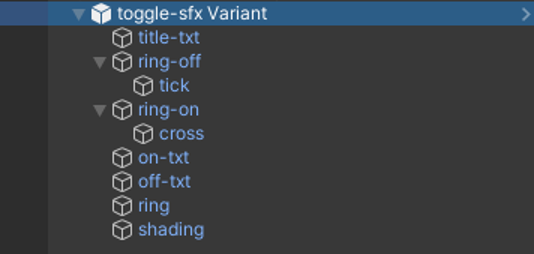
The element component will then carry out the tween on its gameobject that it’s attached to.

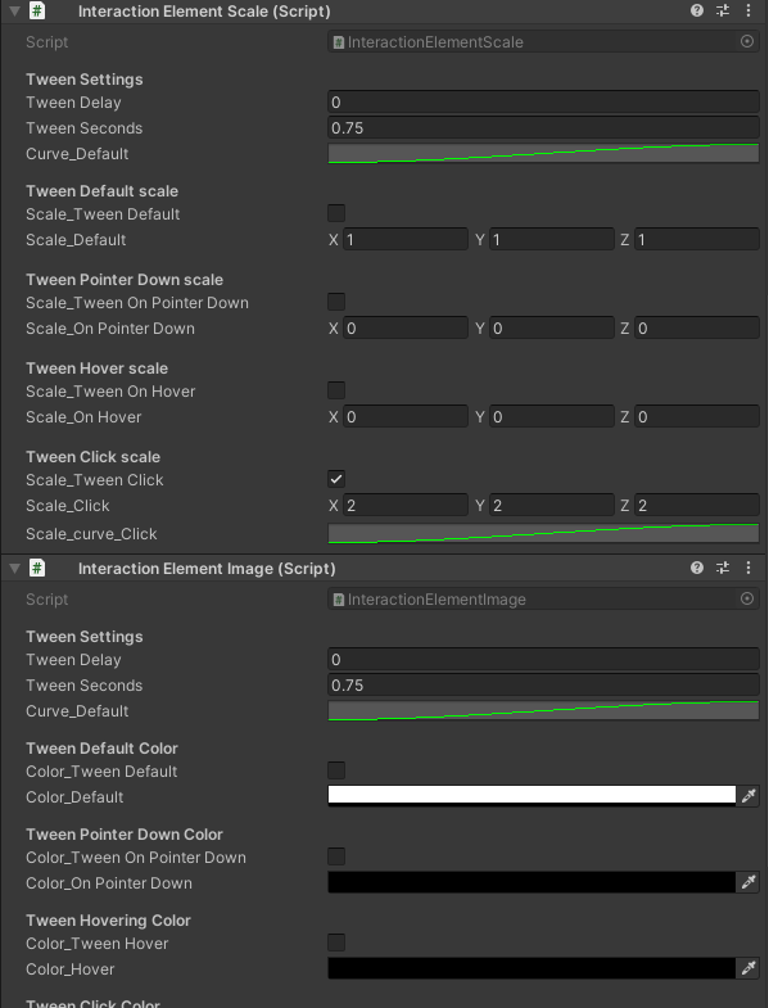
This one here is a scale interactable. You click a bool to make it do what you want on certain input events. 

So you add a Generic UI Toggle and then add Interaction elements on to the objects you want animated.

If you’re looking to improve your UI performance this Unity page is well worth a read. One of the best things about releasing Ruya has been reading some of the wonderful comments. Players have spoken about how relaxing and beautiful the game is, how the mechanics are simple yet engaging and how people have played Ruya to rest their mind from the hustle-and-bustle of day to day life. We’re excited about continuing the Ruya journey and allowing more players access to the game.

Feel free to reach out to us on Twitter or join our Discord if you have questions about any of this. Keep an eye out for Ruya on consoles in the near future too!

Until next time,

Tom